I have to break my blog's long streak of baked desserts with this wonderful dish which can either be a vegetarian main meal (without the bacon of course) or an appetiser. Adapted from next month's edition (Nov 2006) of the BBC GoodFood magazine, walnuts are in season now so I thought of doing this while these nuts are still relatively cheap. I was already preparing to dislike it when the bacon began to unravel and spill out the contents in 2 of the mushrooms. But I was pleasantly surprised with its yumminess - the bland mushroom going well with the creamy goat's cheese, the crunch of the walnuts and the smoky saltiness of the bacon. Lovely eaten with some leafy salad on the side.
The original recipe called for the bacon to be tied around the mushroom. But either my mushrooms were too big or the bacon rashers were too short that it didn't have much to give to tie it. So I put it in place with toothpicks and just removed them before serving. Another deviation I made is with the mushrooms. It was supposed to be open cup but I can't find any so I got the next best thing - big closed cup ones which I just sliced off the stem and the part around it making it effectively 'open cup'. It worked well if I may say so. :)
 Stuffed Mushrooms with Walnuts & Goat's Cheese
6-8 open cup mushrooms, stalks removed
2 Tbsp oil
2 shallots or 1 small onion - chopped
1 garlic clove - finely minced
80 g [1/2 cups] chopped walnuts
2 tsp chopped fresh sage leaves or 1 tsp dried
2 Tbsp chopped fresh parsley
175 g firm goat's cheese - sliced into 6-8 pieces
6-8 thin rashers streaky bacon
- Preheat oven to 190°C/fan 170°C/375°F/gas mark 5.
- Lightly grease a baking sheet and place mushrooms stem side up on it.
- Fry the onion in oil until soft.
- Add garlic, herbs, chopped walnuts, and seasonings (salt/pepper). Remove from heat.
- Spoon the walnut mixture in the mushrooms. Top with a slice of goat's cheese.
- Tie a rasher of bacon around each mushroom (tied at the top). If the rashers are not long enough for tying, secure on the mushrooms with toothpicks.
- Bake for 15-20 minutes or until mushrooms are tender and the bacon crisp.
- Remove toothpicks (if using) before serving.
They say 'charity begins at home'. I'm exercising that virtue with the shameless plugging of a business venture set-up by relatives.
Several times I've been asked (or emailed) of any online Filipino shops that would deliver within Europe. I, of course, have to answer in the negative because I don't know of any at that time. Well, that changes now with the launch of the Online Pinoy Market. Initially they are offering pharmaceutical products that are well known and popular in the Philippines. Items like vitamins and facial moisturisers. These are now available for distribution (meaning for retailers) and very soon available for retail.
So please visit their temporary website (final one available soon) here and get in touch with the contact person for your orders.
Good luck in OPM's new venture !
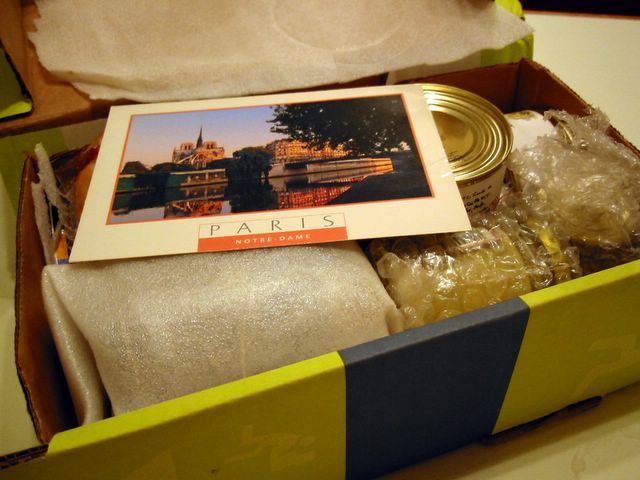
 I've been tardy in blogging about the nice package I received from France maybe I'm too busy eating it all up! Thanks very much Betty for the very very nice Breton Galletes and another crepe-like biscuit which I forgot the name because they've all been eaten up by my kids. Other gems in the box are - chestnut tree honey, honey candies, walnut and currant mustard, quail pate, and wild boar pate. I was relieved that Betty wrote out the translations in her accompanying postcard I was nearly ready to grab my daughter's French-English dictionary. Betty, who's an American living in Aveyron, France, blogs at Cuisine Quotidienne.
Ahh, it's so nice to receive a parcel from a mystery sender knowing that you will find goodies in it. I had always participated in EBBP since the beginning but I was so tied up with work and moving house that I didn't make it in the last 2. I'm glad I'm back in the swing of things.
A big thanks is also sent on its way to Johanna of the Passionate Cook who tirelessly organised this edition. Her round up is here.


 A colleague celebrated her birthday (Happy Birthday Aldora!) which was a perfect excuse for me to bake a cake. I was skeptical of the recipe's name because for the most part, all 'fudge' brownies I made were inconvertibly unfudge-like. Did I overbake them? Maybe. Or my old oven was a dud. Yeah blame it on the oven again. Now that we've moved house with a newish oven I'm running out of excuses. Well funny enough it did turn out good and well fudgy in the middle. Hooray!
Lesley Allen provided the recipe I adapted from the Great American Food cookbook.
Fudge Brownies
150 g [1 cup] plain flour
1/8 tsp fine salt
170 g [6 oz] dark chocolate (at least 60% cocoa mass)
1 tsp instant espresso coffee
1 tsp vanilla extract
125 g [1/2 cup] unsalted butter - softened
170 g [3/4 cup] caster sugar (superfine)
110 g [1/2 cup] firmly packed soft brown sugar
120 g [1/3 cup] golden syrup or light corn syrup
3 large eggs
120 g [1 cup] roughly chopped pecan or walnuts
- Grease and flour lightly a 9-inch (23 cm) square pan. Preheat the oven to 180°C/fan 160°C/350°F/gas mark 4.
- Mix the flour and salt well then set aside.
- Break chocolate into pieces and melt in a heatproof bowl over a saucepan of simmering water.
- Add the instant espresso coffee and stir until well combined. Remove from heat and set aside.
- Beat the butter, sugars, and vanilla until light and fluffy (about 3 minutes). Add the golden syrup and mix well.
- Add eggs one at a time beating well after each addition.
- Beat in the melted chocolate mixture.
- Add in the flour and beat at low speed until smooth.
- Fold in 2/3 of the nuts.
- Pour the batter into the prepared pan. Sprinkle the rest of the nuts on top.
- Bake for 40-45 minutes until a thin skewer poked in the middle comes out clean but not dry - DO NOT overbake!
- Remove from oven and cool in the pan for a few minutes then turn out to a rack to cool completely. Cut into squares and serve.

 The first lot of this season's apple came my way through the kindness of my colleague Colin and his wife. They were nice enough to give me a big shopping bagful of these wonderful tart apples. At first I thought they were Bramleys but upon slicing it and taking a bite it looks like a cross between a Bramley and a Granny Smith. The size and the outside looks very much like a Bramley. The main difference is that you can eat it raw unlike the Bramley, which although excellent as a cooking apple, is virtually inedible in its raw state. Colin didn't have a clue on this variety's actual name. He did say that they use it for both baking and as a dessert apple. Thanks to them we've got a more than enough for several cakes and pies which will definitely not go amiss with my son.
I seem to have the habit lately of doing the cover dish in the BBC GoodFood magazine. The October 2006 provided the recipe of which the only procedure to slow you down is the peeling, coring and slicing of the apples. The cake is more of the pudding type - stodgy, dense, and quite filling. I like the fact that it's not very sweet and jam-packed with this season's fruits.
 Apple & Blackberry Cake
175 g butter - softened
300 g plain flour
4 tart cooking apples - Bramleys, Granny Smith, etc. (about 800gm/1lb 12oz)
a squeeze of lemon juice
284 ml carton whipping cream or double cream
225 g [1 cup] golden caster sugar, plus 1 Tbsp for sprinkling
3 eggs
300 g fresh blackberries
- Butter a 12-inch x 8-inch pan (30cm x 20cm) or a 13-inch x 9-inch (33cm x 23cm) oval pan. Preheat oven to 200°C/400°F/fan 180°C/gas mark 6.
- Peel, core and slice the apples. Place in a bowl and toss in lemon juice to stop it from going brown. Set aside.
- In a saucepan, put cream and butter. Bring to boil in medium heat. Set aside.
- Beat sugar and eggs in a big bowl for about 3 minutes or until thick.
- Add in the cream mixture and beat until well combined.
- Fold in flour with a metal spoon until smooth.
- Pour in the prepared pan.
- Put slices of apple on top, making some of them to sink a little into the batter.
- Scatter blackberries over the apples.
- Sprinkle the sugar on top.
- Bake for 50 minutes until golden and pulling away from sides.